
An attic can look flawless when finished and still be cold in winter, stifling in summer, or affected by condensation after the first season. The difference isn't just the thickness of the insulation. When you want to know how to insulate an attic correctly, you need to look at the roof as a system: protection against water from outside, vapor evacuation where needed, thermal insulation, air sealing, and interior finishing.
A single film installed incorrectly, or a joint left open around a skylight, can compromise the performance of the entire job. The result is predictable: heat loss, higher bills, damp stains, wood exposed to decay, and comfort that doesn't match the investment.
How to insulate an attic correctly: start with the roof
Before choosing materials, check the condition of the roof covering, the wood structure, and the existing layers. An active leak isn't fixed by adding insulation. First repair the roof covering, and check the gutters, ridges, flashings, and the areas around skylights.
Then identify what's already under the roof covering. A breather membrane installed correctly allows controlled evacuation of vapor from the structure while also protecting against water and wind-driven dust. If the roof has sheathing, the type of membrane and the ventilation space need to be carefully assessed. Not every roof has the same capacity to dry toward the outside.
The wood must be dry, sound, and treated where needed. If there are signs of mold, a persistent damp smell, or blackened rafters, stop the installation until the cause is identified. Insulation shouldn't hide a problem — it should function within a protected structure.
The correct layer order matters
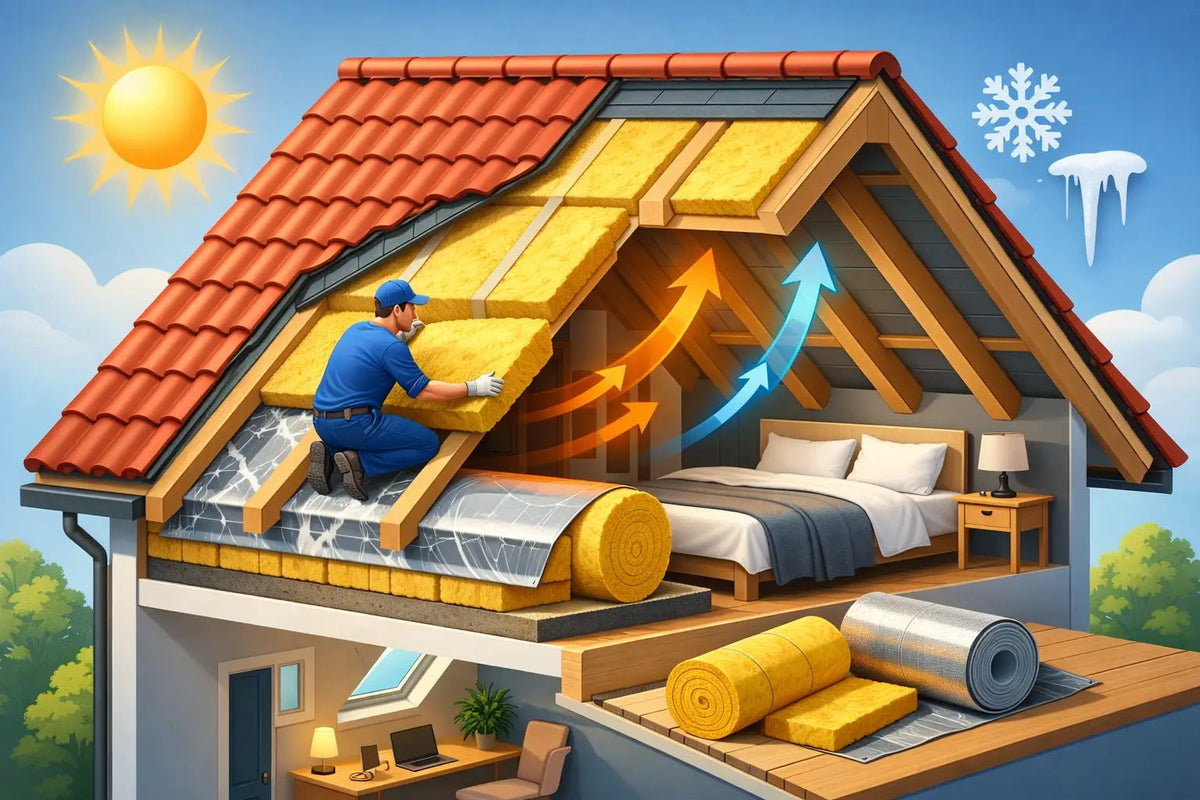
From outside to inside, an attic roof typically has the roof covering, the ventilation space, the breather membrane, thermal insulation between the rafters, an additional insulation layer under the rafters, the vapor control and air-sealing membrane, a service cavity for installations, and the interior finish.
The exact configuration depends on the roof type and the materials already installed. The essential idea stays the same: water must be blocked from the outside, vapor must be managed, and warm indoor air must not be allowed to seep uncontrolled into the cold zones of the roof.
Insulation between the rafters isn't always enough
Installing thermal insulation only between the rafters is common but leaves thermal bridges through the wood. Rafters conduct heat better than an insulating material, and those repeated paths can reduce the assembly's real performance.
That's why a second continuous layer, installed under the rafters, is an effective solution. It covers the structure, improves thermal uniformity, and can also contribute to sound comfort. For livable attics, combining insulation between the rafters with insulation under the rafters gives more predictable results than a single layer sized to the depth of the wood.
Thickness is determined by the available space, the material's thermal performance expressed as Lambda, and the project's goal. A thicker insulation isn't automatically the right choice if it blocks ventilation, compresses the material, or unnecessarily reduces usable height. What matters is achieving a continuous system, without gaps and without vulnerable areas.
Don't compress the insulating material
Mineral wool or other fibrous materials must be installed at the correct size, without being packed too tightly. Compression reduces the volume of air trapped in the structure and can lower thermal efficiency. At the same time, wide joints, imprecise cuts, and gaps around the rafters allow air circulation and reduce performance.
Cut each piece with a small margin so it sits firmly between the structural elements without deforming. Around chimneys, recessed spotlights, or other heat sources, respect the safety clearances and use solutions compatible with fire protection requirements.
Vapor barrier or smart membrane?
This is one of the most important decisions. Indoor air contains water vapor from cooking, showers, breathing, and drying laundry. In winter, warm, humid air tends to migrate toward colder zones. If it reaches the insulation and condenses, the moisture can reduce the material's efficiency and damage the wood.
A vapor control membrane installed on the warm side of the insulation limits this transfer. In many renovations, variable vapor-permeability membranes are a safer choice, because they can support controlled drying of the structure toward the inside when conditions require it. Still, the choice isn't made by a universal rule. It depends on the roof, whether a breather membrane exists on the outside, the indoor climate, and the materials already present in the existing layers.
A reflective film can add extra functions for vapor control and thermal radiation reflection, but its reflective performance needs an air space. Don't treat it as an automatic substitute for the full thickness of thermal insulation. The role of each layer must be defined clearly before installation.
Air sealing is the test of a well-made attic
The membrane doesn't work correctly if it's just stapled in place. Overlaps must be taped, and all penetrations must be sealed: cables, pipes, ventilation ducts, beams, skylights, and wall junctions.
This is where most mistakes happen. A membrane perforated by installations and left unsealed lets warm air reach behind the insulation. That's why a service cavity between the membrane and the drywall board is recommended. Installations run in this gap, not through the layer that provides vapor control and air sealing.
Use sealing tapes compatible with the membrane, adhesives for joints, and sleeves for penetrations. Where the membrane meets masonry or wood, the substrate must be clean, stable, and dry. Sealing applied over dust, crumbling plaster, or damp wood won't stay reliable over time.
The details that determine real comfort
Skylights, the ridge, the eaves, gable walls, and the area behind built-in furniture are sensitive points. Around a skylight, the insulation must be continuous, and the membrane's junction must be made without interruptions. A gap of just a few centimeters can create a cold surface where condensation appears.
At the eaves, don't block the roof's ventilation path with thermal insulation. At the ridge, maintain the continuity of the insulating layer and the sealing. At gable walls, check the junction between the roof insulation and the wall insulation, so air doesn't circulate behind the finishes.
Sound comfort is worth considering, especially in urban areas, under heavy rain, or near traffic. Fibrous materials can dampen airborne noise, and correctly separating the finish from the structure can reduce vibration transmission. If the attic will be a bedroom, an office, or a children's room, this factor makes a difference in everyday use.
Mistakes that cost more than the right materials
The most costly problems appear when the job looks finished and accessing the layers means removing the finishes. Avoid installing insulation over damp wood, skipping a proper membrane, gaps in the sealing, using incompatible tapes, and covering ventilation grilles.
Another mistake is choosing materials based only on price per roll or per square meter. Compare usable thickness, Lambda value, coverage area, mechanical strength where needed, and the functions of the system. A well-configured package can reduce the risk of incomplete purchases and improvisation on installation day.
For a new attic, the renovation of an old roof, or an A-frame construction, the right solution is determined by the structure and its details, not by a generic recipe. Isoflect can help configure a system adapted to your project, with insulation, condensation control, and sealing materials that are compatible with each other. A technical discussion before ordering is often the simplest way to avoid an expensive intervention after the first cold season.